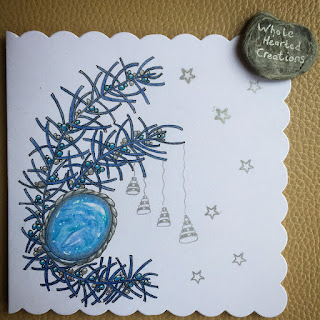
And so it is Christmas. I have had so much fun making cards this year...
Search This Blog
Friday, 23 December 2016
Friday, 2 December 2016
4Rosie Zentangle Pattern Deconstruction
Hey there tangling friends!
I thought I would do a blog post for each of the patterns I have created. They won't be enormously long, but I hope they'll help some of you understand the line work and shading a little better.
I published the pattern at the beginning of June 2016, but I've found an example in my pictures from a year earlier. It's funny how we have designs that we gravitate to, even subconsciously. I love the way it's squishy and sharp at the same time, and that there are lots of different ways of filling it and shading it. Rick and Maria recently published Book introducing the new terms Reticula and Fragments, which is about taking bits of a pattern and playing with them in a grid. This gave me the idea to try 4Rosie differently.

The original basic pattern has 4 sections in a square shape. As you can see in this picture you can add as many sections as you like, which make it much more organic. I have added Aquafleur to this drawing - another favourite of mine.

This is the basic deconstruction of 4Rosie, as found on here. I have done different designs in each central petal - stripes, leaf pattern, Betweed and bubbles. I also often just colour them, as above, leaving some white showing where the light will hit it - which makes them look rounded.

This picture is from October 2015 and is the first example of 4Rosie that I can find (bottom left corner). You can see how it has evolved into the step out and then to the more organic example athe top.
The last few weeks I have been looking at how 4Rosie would look at as grid pattern and playing around...
Here's the first wobbly doodling page! I could definitely see good possibilities.
I decided to do a tan tile with the grid pattern. The progress shots show how I did it...

I started by drawing a grid with a ruler (my hand was very wobbly that day!) And then drew the original pattern in the middle, then there's 2 corners with the pattern pointing inwards, which I really like. I used one quarter of the design in 2 corners, with a little petal to balance it out.

Adding colour.

Colouring finished, using white pencil to highlight areas where the light would hit.
Starting to add shading - at the bottoms of the petals where they touch the green borders and on the rounded tops. Also where the petals overlap each other and in the middle to show depth.
Here's the final tile - very pleased with how it has turned out.
Another more organic version, again with Aquafleur.
This blog has good informative about Zentangle Fragments and Reticula...
Tanglemania Blog
There are two videos on YouTube with 4Rosie tutorials...
YouTube 4Rosie
YouTube 4Rosie
I thought I would do a blog post for each of the patterns I have created. They won't be enormously long, but I hope they'll help some of you understand the line work and shading a little better.
I published the pattern at the beginning of June 2016, but I've found an example in my pictures from a year earlier. It's funny how we have designs that we gravitate to, even subconsciously. I love the way it's squishy and sharp at the same time, and that there are lots of different ways of filling it and shading it. Rick and Maria recently published Book introducing the new terms Reticula and Fragments, which is about taking bits of a pattern and playing with them in a grid. This gave me the idea to try 4Rosie differently.

The original basic pattern has 4 sections in a square shape. As you can see in this picture you can add as many sections as you like, which make it much more organic. I have added Aquafleur to this drawing - another favourite of mine.

This is the basic deconstruction of 4Rosie, as found on here. I have done different designs in each central petal - stripes, leaf pattern, Betweed and bubbles. I also often just colour them, as above, leaving some white showing where the light will hit it - which makes them look rounded.

This picture is from October 2015 and is the first example of 4Rosie that I can find (bottom left corner). You can see how it has evolved into the step out and then to the more organic example athe top.
The last few weeks I have been looking at how 4Rosie would look at as grid pattern and playing around...
Here's the first wobbly doodling page! I could definitely see good possibilities.
I decided to do a tan tile with the grid pattern. The progress shots show how I did it...

I started by drawing a grid with a ruler (my hand was very wobbly that day!) And then drew the original pattern in the middle, then there's 2 corners with the pattern pointing inwards, which I really like. I used one quarter of the design in 2 corners, with a little petal to balance it out.

Adding colour.

Colouring finished, using white pencil to highlight areas where the light would hit.
Starting to add shading - at the bottoms of the petals where they touch the green borders and on the rounded tops. Also where the petals overlap each other and in the middle to show depth.
Here's the final tile - very pleased with how it has turned out.
Another more organic version, again with Aquafleur.
This blog has good informative about Zentangle Fragments and Reticula...
Tanglemania Blog
There are two videos on YouTube with 4Rosie tutorials...
YouTube 4Rosie
YouTube 4Rosie
Subscribe to:
Comments (Atom)


